
Last Updated: September 30, 2026
How to Create a Team Store QR Code
OVERVIEW
This SOP walks you through the process of duplicating an existing QR code, updating its program information, relinking it to the correct destination, testing that it works properly, and downloading the final file. Use the steps below to learn how to confirm the QR code points to the correct store or program and is ready to use.
STEP-by-STep guide
1. Locate the existing QR Code Template & Duplicate it 0:00
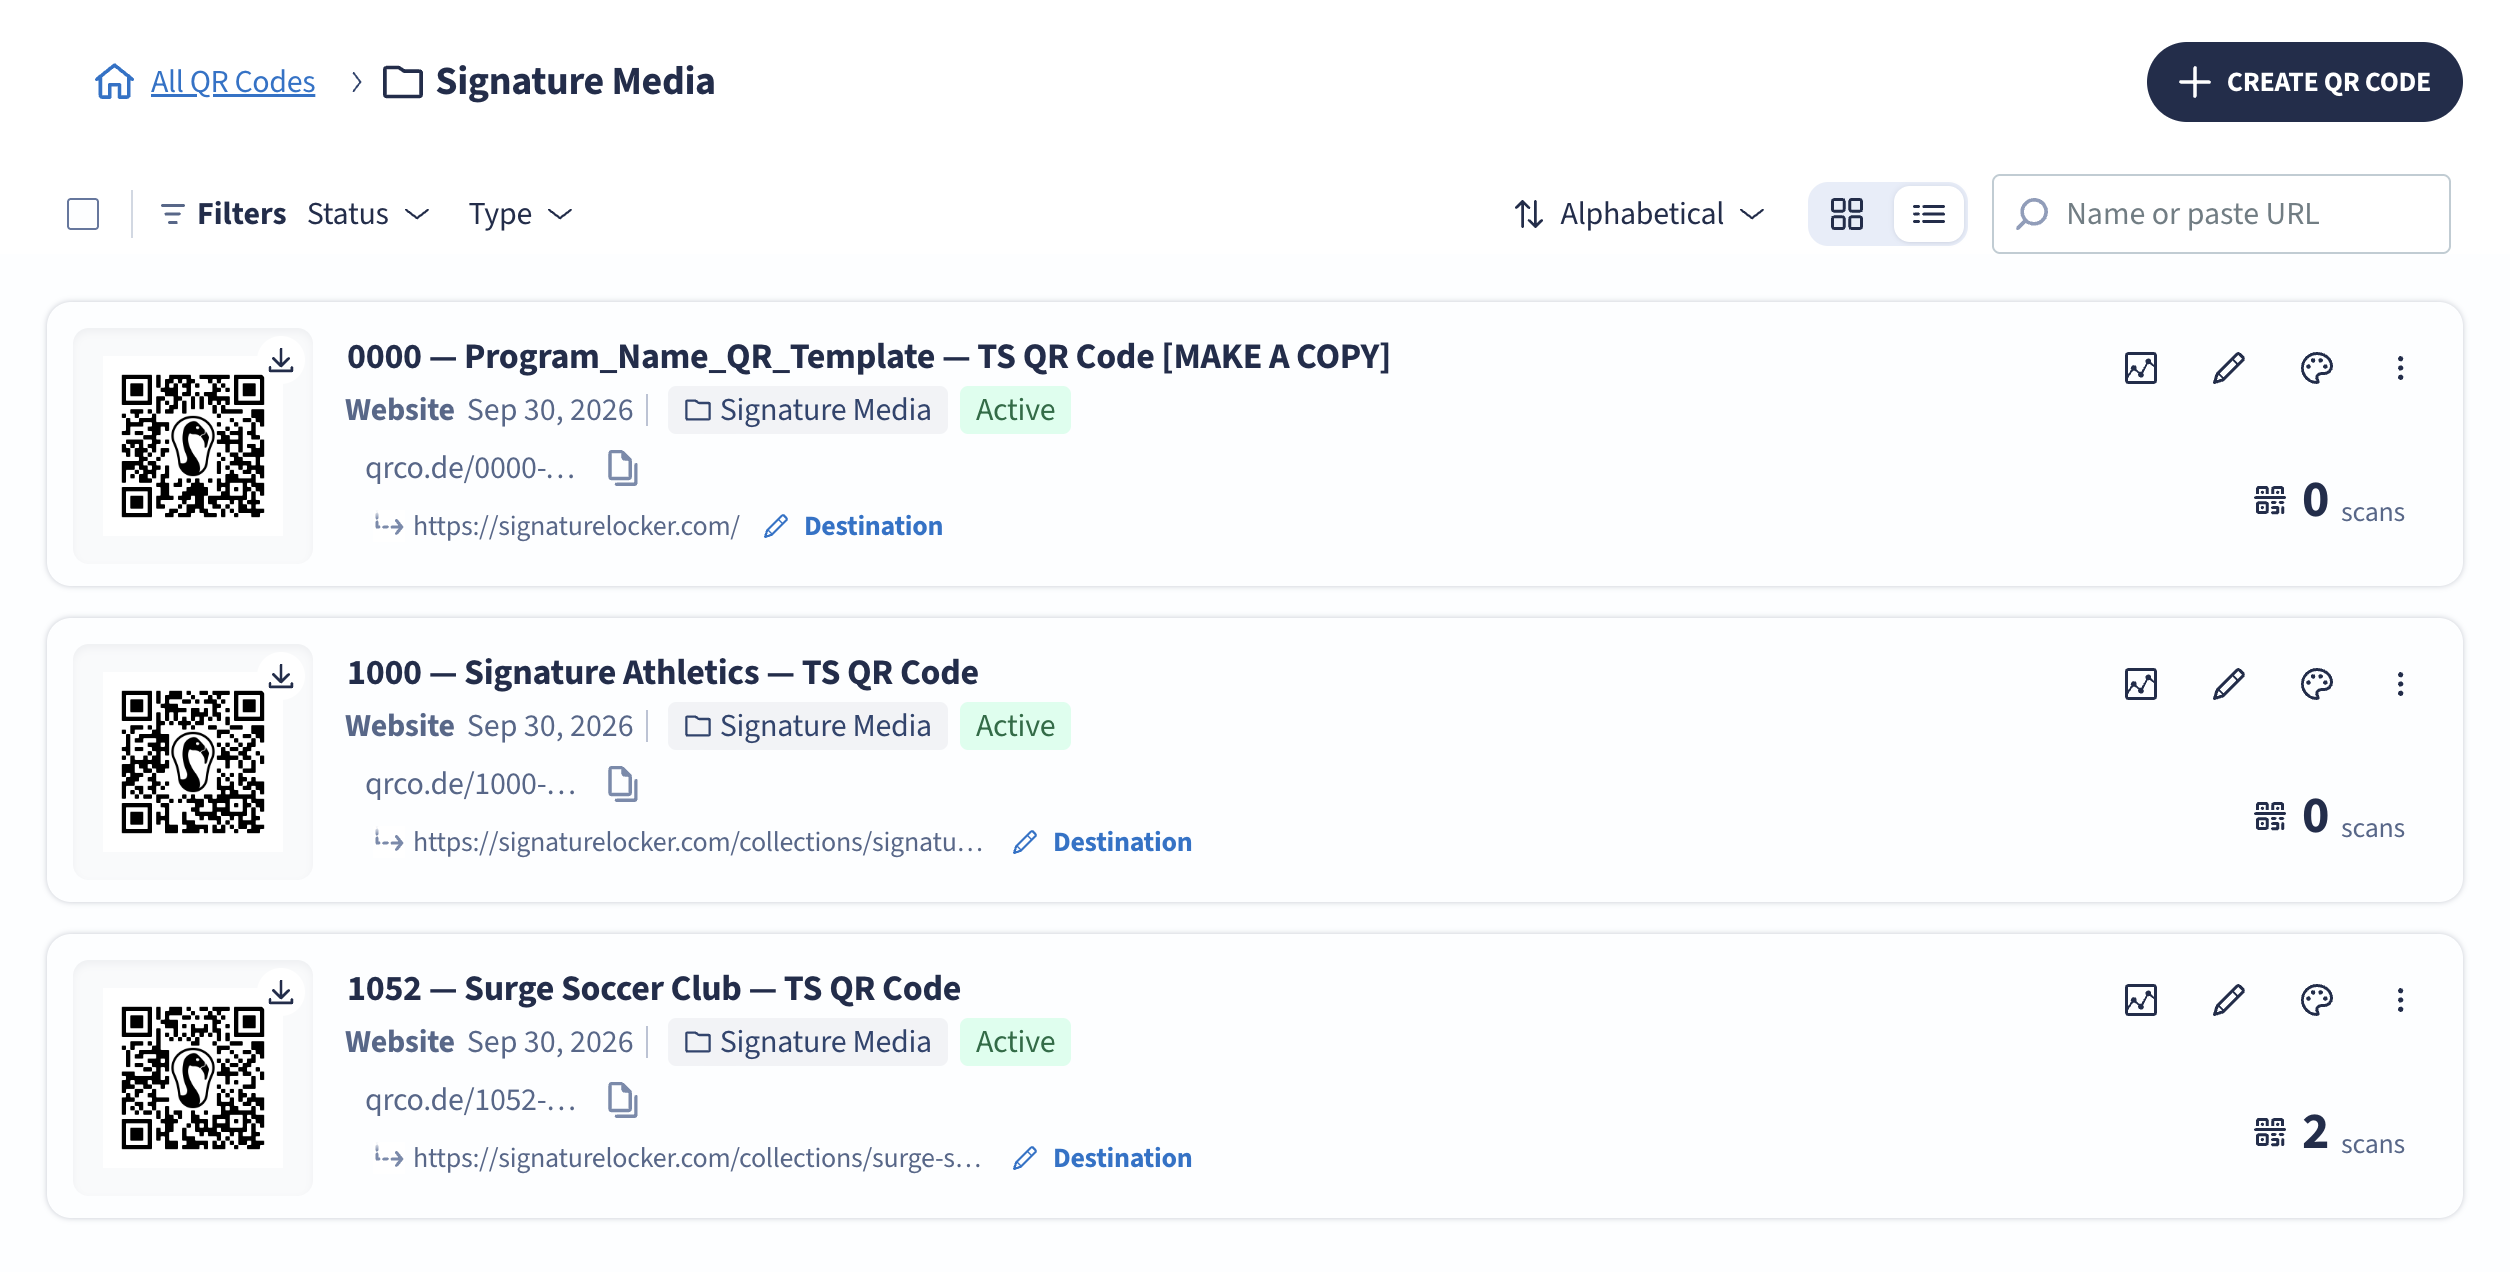
- Open the QR code generator and locate the existing, already-designed QR code template.
- Switch to the Signature Media folder/view if needed so you are working from the correct source.
- Sort the list Alphabetically if the QR code is not easy to find.
- Select the correct QR code and click Duplicate instead of creating a new code from scratch.
- Rename the duplicated item using the new program name and/or program ID so it is easy to identify.
2. Update the program name, program ID, and short name 0:15
- Replace the copied template details with the new program information.
- Update the Program ID to match the new record.
- Update the Program Name to match the correct program/store.
- If needed, copy the name from the source record first so you can paste it into the duplicate.
- Confirm the duplicate now reflects the correct program identity before moving on.
3. Relink the QR code to the correct destination page 3:31
- Open the duplicated QR code and click Edit.
- Replace the old destination name (for example, the previous locker/team page) with the correct page name.
- Save the changes, then go back to confirm the update.
- Use the program information from the sales sheet or Zyflow record to ensure the destination matches the correct store/program.
- If you need the exact page reference, use the program ID from the source record and confirm it matches the intended destination.
4. Create and update the shortcode 4:28
- Open the Edit Shortcode option.
- Enter the new shortcode using a hyphen instead of a vertical bar.
- Use the correct format based on the program ID and short name (for example,
1052-SYC). - Save and confirm the shortcode update.
- Verify the shortcode appears correctly in the QR code details after saving.
5. Verify the QR code works correctly 5:25
- Click the QR code link to confirm it opens the correct destination.
- Scan the QR code using a phone to test the live experience.
- Confirm the scan routes to the intended store/page.
- Check the analytics or scan count to confirm at least one scan was recorded.
- Use this as your quality check before distributing the QR code.
6. Download the final QR code file 7:27
- Use one of the available download icons to export the QR code.
- Choose the correct file type for your use case.
- The default download is usually PNG, but SVG is preferred if you need to edit the design or change the color.
- Download the SVG version when you need flexibility for resizing or color changes.
- Save the file in the correct location for future use or sharing.
Cautionary Notes
- Do not create a brand-new QR code if a duplicate of the existing template will work.
- Make sure you are editing the correct folder/view, especially Signature Media, before duplicating.
- Confirm the Program ID, Program Name, and destination page all match the intended store/program.
- Use a hyphen in the shortcode; do not use a vertical bar.
- Always test the QR code on a phone before finalizing it.
- Don't assume the QR code is correct until analytics show a scan and you've verified the destination.
Tips for Efficiency
- Copy the program name and ID from the source record before editing to reduce typing errors.
- Sort alphabetically to find the correct template faster.
- Use the sales sheet or Zyflow as the source of truth for program IDs.
- Download the SVG version if you may need to edit the QR code later.
- Keep naming consistent so you can easily identify and manage duplicate QR codes.